China Top How to Replace Self Loading Mixer Blades?

Time:2026-10-17 Author:Oliver
0%

Replacing worn mixing blades can restore concrete consistency, reduce drum strain, and protect production efficiency. However, the job demands more than removing a few bolts. A self-loading concrete truck combines a rotating drum, hydraulic components, water systems, and heavy steel parts. One careless movement can create serious risks.

This guide addresses the practical question: “How to replace the mixing blades in a self-loading concrete truck?” It explains how to prepare the machine, isolate all energy sources, inspect blade supports, and install replacement parts accurately. The process should follow the truck manufacturer’s service manual, because blade shapes, bolt patterns, and tightening values vary between models. Never rely on appearance alone. A blade may look usable while hidden cracks weaken its mounting area.

Safety comes first. Park the truck on stable ground, stop the engine, remove the ignition key, and prevent drum movement. Release hydraulic pressure only according to the manufacturer’s instructions. Use suitable lifting equipment when handling heavy blades. Gloves, eye protection, and protective footwear are essential.

Small details matter. Clean concrete buildup around each fastener before inspection. Mark the blade position before removal. Check nearby brackets for bending, corrosion, or elongated bolt holes. Replace damaged hardware instead of forcing old parts back into service. It is easy to rush this work. That mistake can cause uneven mixing, vibration, or premature wear.

After installation, rotate the drum slowly and listen for contact or unusual resistance. Confirm clearances before returning to normal operation. If the procedure feels uncertain, stop and consult an authorized technician. A careful repair is usually faster than correcting an avoidable failure.
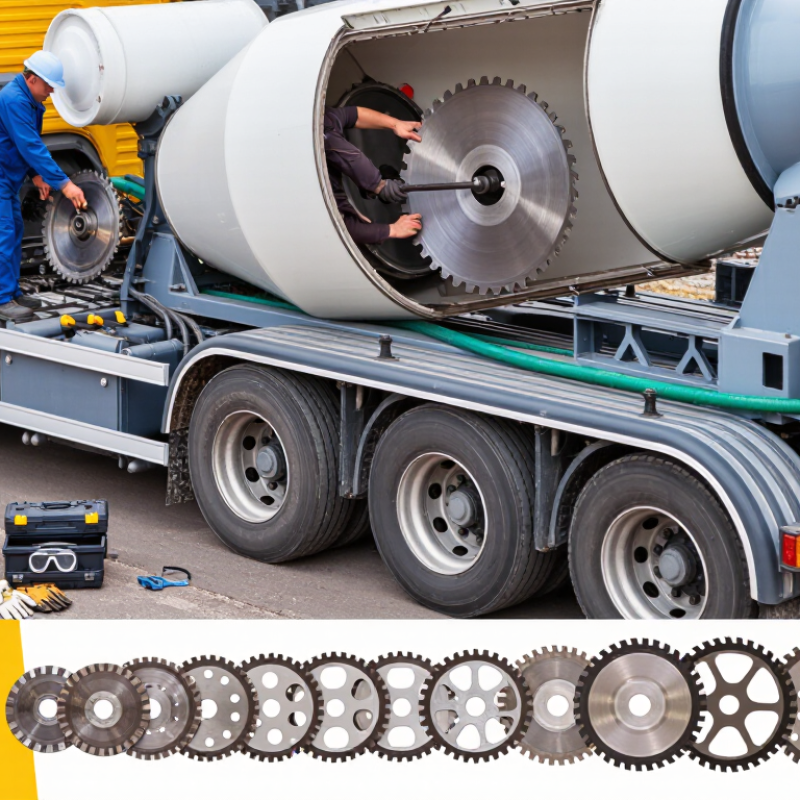
China Top How to Replace Self Loading Mixer Blades?

Identify Blade Wear and Prepare the Self-Loading Mixer

Before replacing self-loading mixer blades, inspect the wear pattern, not only the blade thickness. Rounded cutting edges, deep grooves, bent corners, and uneven gaps signal reduced mixing performance. A practical field check uses a straightedge and feeler gauge. Record the gap at several points. A gap difference above 3–5 mm deserves closer inspection, although the service manual should control the final limit.

Concrete residue can hide damage. Park on firm ground, isolate power, lower the bucket, and secure moving parts before inspection. Remove hardened buildup with controlled methods. Avoid striking blades with excessive force; cracked metal may fail later under load. ACI 304R recommends consistent charging and mixing practices, while ASTM C94/C94M emphasizes controlled mixing and delivery performance. These standards do not provide one universal replacement interval. That is important. Aggregate hardness, moisture, and daily loading cycles change the answer.

Tips: Photograph each blade before removal. Mark its position, then compare the new edge with the old one. Replace matched blades in opposing positions when possible. Tighten fasteners to the equipment maker’s specified torque, and recheck them after the first operating cycle. Keep dust controlled during cleanup.

OSHA’s respirable crystalline silica limit is 50 micrograms per cubic meter over an eight-hour shift. Small maintenance tasks still need discipline. I have seen teams replace one visibly damaged blade and ignore its uneven partner. That saves minutes, but it can create vibration, poor discharge, and faster wear. Test with a small batch first.

Gather Replacement Tools, Parts, and Safety Equipment

Replacing self-loading mixer blades starts with preparation, not removal. Park the machine on firm, level ground and lower the loading bucket completely. Stop the engine, isolate the battery, and follow the service manual’s lockout instructions. Gather replacement blades, matching bolts, nuts, washers, spacers, and any specified locking components. Do not mix old hardware with new parts without checking compatibility.

Use heavy work gloves, safety glasses, protective footwear, and close-fitting clothing. Keep a torque wrench, socket set, breaker bar, drift punch, wire brush, scraper, and suitable lifting support nearby. A second person can help control a heavy blade, but never place hands beneath suspended parts. Inspect the blade carrier for cracks, distorted holes, worn welds, and packed concrete before installation. Small defects matter.

Clean each mounting surface carefully. Confirm the new blades match the original length, curvature, hole spacing, and cutting direction. Install hardware in the correct order, then tighten it to the manual’s specified torque. Mark each fastener after final tightening. I have learned that visual tightness is unreliable, especially after vibration and dried concrete exposure. One rushed check can create uneven mixing or dangerous loosening. Recheck blade clearance by rotating the drum manually, with power isolated. The blade should move freely without touching the drum, frame, or neighboring components. If alignment looks slightly wrong, stop and investigate rather than forcing the assembly.

How to Replace Self-Loading Mixer Blades

Typical time allocation for a safe blade replacement workflow. The values are practical planning estimates and may vary with mixer size, blade condition, access, and technician experience.

Safety reminder: Park the mixer on level ground, switch off the engine, isolate all power sources, lower and secure the drum, wear suitable personal protective equipment, and verify that the blades cannot move before removing fasteners.

Remove the Worn Blades from the Mixing Drum

Removing worn blades from a self-loading mixer requires patience, firm footing, and careful preparation. Park the machine on level ground. Lower the loading bucket completely. Stop the engine, remove the key, and isolate every power source. The mixing drum must not rotate during this work. Clean away wet concrete around the blade mounts. Hardened material can hide loose bolts and sharp edges.

Wear cut-resistant gloves, eye protection, and safety footwear. Open the drum access panel, then rotate the drum manually to reach each damaged blade. Use a suitable wrench, penetrating fluid, and controlled force on seized fasteners. Do not strike the drum shell with a heavy hammer. It may deform the surface. Support each blade before removing its final bolt. A falling blade can injure hands or damage nearby components. Keep removed bolts in a marked tray. Small parts disappear easily.

I have found that corrosion often makes the first blade the hardest. Allow extra time for it. Check the mounting plates after removal. Look for elongated holes, cracks, or distortion around the welds. One mistake is replacing blades without checking alignment. That can create uneven mixing and vibration later. Photograph the original blade position before removal. It helps, although my first reference photo was too dark to be useful. Measure the blade angle and gap from the drum wall. Record these details before cleaning the mounting area for new parts.

Install and Secure the New Mixer Blades

China Top: How to Replace Self-Loading Mixer Blades?

Replacing self-loading mixer blades is a controlled maintenance task, not a quick repair. Park the machine on firm, level ground. Lower the loading bucket and switch off the engine. Remove the ignition key. Then isolate electrical, hydraulic, and mechanical energy. OSHA’s control-of-hazardous-energy guidance, 29 CFR 1910.147, supports lockout procedures before maintenance. The U.S. Bureau of Labor Statistics recorded 5,283 fatal occupational injuries in 2023. A moving drum can turn a small mistake into a serious event.

Wear cut-resistant gloves, eye protection, and safety footwear. Secure the drum with approved blocks or pins. Never trust hydraulic pressure alone. Mark each old blade before removal. This helps preserve the original mixing pattern. Clean the mounting surfaces and inspect bolts, washers, blade holders, and drum liners. Replace stretched threads or damaged fasteners. Small defects matter.

Fit the new blades in the same orientation and keep the working edges consistent. Tighten fasteners gradually in a cross pattern. Use a calibrated torque wrench and follow the equipment manual’s torque value. Over-tightening can distort the holder. Under-tightening may cause movement during mixing. ISO 12100:2010 emphasizes risk reduction through design, guarding, and verification. Check blade clearance by rotating the drum manually. Then run the mixer empty at low speed for several minutes. Stop and recheck every fastener. I would not skip this second inspection, even when the installation looks perfect. Loose hardware often reveals itself late.

Test the Mixer and Check Blade Alignment

Replacing self-loading mixer blades requires more than removing bolts.

The real risk appears during testing. Park the mixer on level ground, isolate the power source, and secure the drum before opening it. Photograph the original blade position before removal. It helps when memories become unreliable.

OSHA estimates that proper lockout/tagout controls prevent about 120 fatalities and 50,000 injuries each year in the United States.

Install each blade with clean bolts and evenly tightened fasteners. Use a straightedge to check the blade edge against the drum’s reference surface. Measure several points with a feeler gauge. Compare the left and right clearances. Do not assume a new blade is automatically aligned. A small offset can create uneven mixing, scraping, or abnormal vibration.

Run the mixer empty at low speed first. Keep people outside the operating zone. Watch the blade path through the inspection opening, where permitted by the equipment procedure. Listen for repeated contact sounds. Then test with water before adding aggregate.

Record vibration, motor current, and unusual noise during both tests. Stop immediately if the drum shakes or the current rises sharply. I prefer checking alignment twice, although this adds time. One practical detail matters: recheck bolt tightness after the first loaded cycle.

The U.S. Bureau of Labor Statistics reported 2.6 million nonfatal workplace injuries in private industry in 2023. That figure covers many causes, but it reinforces the value of controlled testing.

FAQS

How can I tell whether self-loading mixer blades need replacement?

Inspect rounded edges, deep grooves, bent corners, and uneven clearances. Blade thickness alone can mislead you. A straightedge and feeler gauge reveal uneven gaps. Differences above 3–5 mm deserve closer inspection.

What should I do before inspecting the blades?

Park on firm, level ground and lower the bucket. Switch off the engine and remove the key. Isolate electrical, hydraulic, and mechanical energy. Secure the drum with approved blocks or pins. Safety comes first.

How can hardened concrete residue be removed safely?

Use controlled cleaning methods and avoid excessive hammering. Cracked metal may fail during later mixing. Keep dust controlled and wear eye protection, suitable gloves, and safety footwear. Small tasks still require discipline.

Should I photograph and mark the old blades?

Yes. Photograph every blade before removal and mark its original position. These records help preserve the mixing pattern and guide installation. Memory is less reliable than a clear photo.

Should only one damaged blade be replaced?

Usually, inspect its opposing blade and nearby components as well. Matched replacement positions can reduce vibration and uneven wear. Replacing one blade may save minutes, but it can create poor discharge. I have seen this mistake happen.

What components should be checked during blade replacement?

Inspect blade holders, bolts, washers, mounting surfaces, and drum liners. Replace damaged fasteners or stretched threads. Clean the contact surfaces before fitting new blades. Small defects matter.

How should the new blades be tightened?

Install them in the original orientation and tighten fasteners gradually in a cross pattern. Use a calibrated torque wrench and follow the equipment manual’s specified value. Over-tightening can distort holders. Under-tightening can allow movement.

What checks should follow installation?

Rotate the drum manually and confirm blade clearance. Then run the mixer empty at low speed for several minutes. Stop and recheck every fastener. Test with a small batch before returning to normal work. Looks perfect? Check again.

Conclusion

Replacing worn blades in a self-loading concrete mixer requires careful preparation, proper tools, and strict attention to safety. First, inspect the mixing blades for excessive wear, cracks, deformation, or uneven edges, then park the mixer on stable ground, switch off the engine, disconnect power, and secure all moving components. Prepare replacement blades, compatible fasteners, hand tools, lifting equipment, gloves, eye protection, and any required cleaning supplies before opening the mixing drum.

How to replace the mixing blades in a self-loading concrete truck? Begin by removing hardened concrete and loosening the fasteners that hold the worn blades in place. Take off the old blades carefully and clean the mounting surfaces. Position each new blade according to the drum’s original layout, tighten the fasteners evenly, and confirm that every blade is firmly secured. After installation, rotate the drum slowly by hand or with the approved operating procedure to check clearance and alignment. Finally, run the mixer at low speed, listen for unusual noise, and inspect the blades again before returning the equipment to normal service.

Oliver

Oliver

Oliver is a seasoned marketing professional with a wealth of expertise in driving brand awareness and engagement. With a deep understanding of our company's product offerings, he consistently delivers high-quality content that enriches our professional blog. His insights not only shed light on......